3 Easy Steps to Using Classroomscreen
Lindsey Merrow
Curriculum Specialist
Blog
Are you tired of toggling between class management apps, timers, and feedback tabs throughout the day? Classroomscreen has got you covered! Classroomscreen is a free digital tool that has 19 widgets that can help create clear expectations, support using visual cues, foster time management, assist with collecting feedback, and much, much more! Here’s how you can get started using it in your classroom in a few quick and easy steps.
Step 1: Launch your screen
You can load Classroomscreen on an interactive display or project it onto any whiteboard. You can create a free account, or just launch a “screen” right from the homescreen. By creating an account, you can save customized screens for quick and easy access next time! If you want to tour the website without an account, simply click the “Launch” button to instantly create a screen. Next, choose one of the stock backgrounds or upload your own image by clicking the background widget on the bottom menu bar, maybe aligned to a class theme or holiday.

Step 2: Customize the screen
You can customize the screen to suit your class needs and objectives. Choose widgets from the bottom menu bar and customize them for your class. Click a widget to pin it to the screen; you can then resize it with the arrow icon and customize the widget with the gear icon. For example, you could have one screen for your centers/stations that can quickly pop up and be customized each day.


Step 3: Start your lesson!
You can easily adjust the settings and widgets for students on the fly. Some popular widgets include:
- Timer – By using the timer, you can let your students know how much time is left for working on their task. This gives them a visual reminder.
- Drawing Tool – Make drawings or notes. You can use it in full screen mode or in a small window, and choose from lined paper, graph paper, or an image background.
- Traffic Light – There are so many options for this. You can use it as a class management tool to let students know when they can conference with a teacher, students can use it on their devices as a progress tool, or you can use it as a noise level monitor.
- “Work symbols” – These are visual cues you can choose from to engage and keep students on task. Work symbols include silence, whisper, ask a neighbor, and work together.

There are so many useful widgets with this tool and they all have their own settings and customization options! Other customizable options include polling, random name generators, QR code generators, sound level monitors, uploading an image, drawing tools, and a clock. Also, in the drop down arrow, there is a calendar, dice, the ability to embed objects, a random group chooser, a stopwatch, a built in webcam, and a video player.
Classroomscreen is a great, one-stop shop tool for your classroom! You can even save the screens for future use and quick access. For more tools that make it easy to engage students and keep them on par, check out the Classroom Management courses on OTIS for educators.
For more tips, tricks, and tools for teaching in and out of the classroom, check out more content on the Teq Talk blog or our YouTube channels OTIS for educators and Tequipment.
We also offer virtual professional development, training, and support with OTIS for educators. Explore the technology and strategies that spark student success — no matter where teaching or learning are happening!
Follow us on social:
![]() edteq
edteq ![]() OTIS4educators | Teq Products | iBlocks
OTIS4educators | Teq Products | iBlocks ![]() OTIS4educators | MyTeq
OTIS4educators | MyTeq ![]() Teq
Teq
0 thoughts on “3 Easy Steps to Using Classroomscreen”
Related Articles & Other Recommended Reading
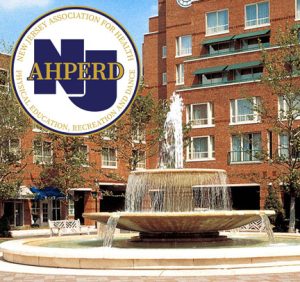
NJAHPERD Conference – May 5th
Teq is New Jersey-bound for the 108th annual New Jersey Association for Health, Physical Education, Recreation and Dance Conference (NJAHPERD)! Taking place on May 5th, this first-class event serves to connect hundreds of career and education professionals. We’re thrilled to collaborate with educators, leaders, and peers to bring this event to life. Don’t miss out […]

PARSS – April 29th to May 1st
Save the date! Teq is ecstatic to attend the annual 2026 Pennsylvania Association of Rural and Small Schools Conference (PARSS). We’re excited to promote equal access to high-quality education by providing first-class professional development opportunities. Taking place from April 29th to May 1st, 2026, this premier event will be held at the Wyndham Garden Hotel […]

NJAIS 2026 Leadership Conference – April 29th-30th
Share, learn, and innovate! Teq’s headed to The Garden State for the 2026 New Jersey Association of Independent Schools Leadership Conference (NJAIS). Taking place from April 29th to April 30th, 2026, this elite event connects admins and educators alike through dynamic professional development opportunities. Don’t miss out; come see it for yourself at the Minerals […]